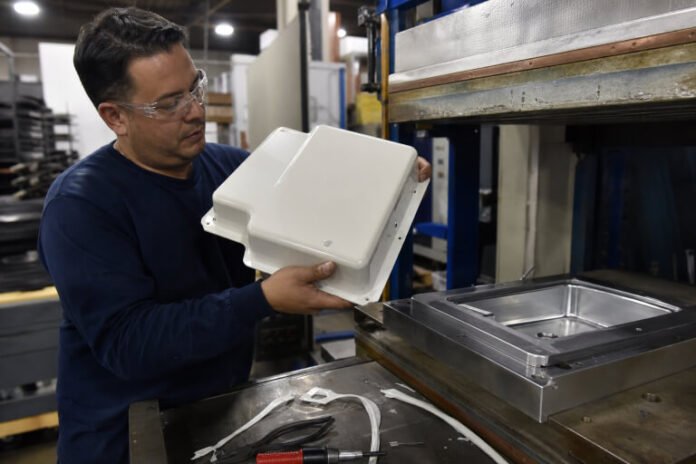

Durable thermoformed parts begin with connected decisions, not a single material choice. The resin, starting sheet thickness, mold construction, forming method, trim strategy, and production volume all influence performance, appearance, and cost. Teams planning custom parts can use https://npi-ks.com/services/custom-thermoforming/ as a starting point for understanding how those decisions come together in a manufacturing project.
A prototype can look successful yet still create problems in production. Thin corners, uneven cooling, poor trim repeatability, weak mounting areas, and an unsuitable material grade can increase scrap or shorten service life. Reviewing these risks before tooling is built helps avoid expensive redesigns later.
Why Material, Tooling, and Process Choice Matter
Thermoforming is especially useful for large, lightweight, custom-shaped components such as equipment housings, trays, liners, enclosures, panels, and covers. It can offer a practical route to durable parts when the process is aligned with the application. The main goal is not simply to form a shape. It is to produce a part that performs reliably after trimming, assembly, shipping, impact, cleaning, weather exposure, and repeated use.
That requires early agreement on functional requirements. Define the expected loads, environment, cosmetic standards, regulatory needs, assembly interfaces, and anticipated production life before selecting material or tooling. A low initial mold cost is not a savings if it causes slow cycles, inconsistent dimensions, or frequent revisions.
How Thermoforming Works
The basic process of heating a plastic sheet until it becomes pliable, forming it against a mold, cooling it, and trimming it into a finished component explains why heat control and material movement matter so much. During forming, plastic does not stretch evenly across every surface.
- Select a plastic grade and starting sheet thickness.
- Heat the sheet evenly to its forming range.
- Position it over or into the mold.
- Use vacuum, air pressure, mechanical assistance, or a combination of methods.
- Cool the part while it remains supported by the tool.
- Trim edges, holes, cutouts, and secondary features.
- Inspect the component for fit, function, finish, and thickness.
Deep draws, sharp transitions, and tall walls concentrate stretch and can create thin areas. Material distribution must be considered alongside appearance, because the most visible surface is not always the most highly stressed portion of the part.
Choosing the Right Plastic Material
There is no universal best thermoforming plastic. The correct choice depends on the part’s job and environment. Ask whether it must resist impact, vibration, oils, cleaners, sunlight, moisture, heat, chemicals, or repeated flexing. Also consider clarity, texture, color stability, flame resistance, and any application-specific approvals.
Common Material Categories
- ABS: Often selected for a balance of impact resistance, stiffness, and attractive surface appearance.
- HDPE: Useful for tough parts that need chemical resistance and outdoor durability.
- PETG: A common choice when clarity, toughness, and formability are priorities.
- Polycarbonate: Suitable for applications needing high impact resistance and transparency.
- Polypropylene: Helpful where low weight, chemical resistance, and fatigue performance are important.
- Acrylic: Often used for optical clarity and weather-resistant surfaces.
Compare grade-specific technical data sheets, not resin names alone. Additives, colorants, recycled content, sheet construction, and processing recommendations can materially change how a plastic heats, forms, trims, and performs in service.
Vacuum Forming vs. Pressure Forming
Vacuum forming pulls a heated sheet against a mold using negative air pressure. It is well-suited to broad shapes, rounded features, trays, covers, liners, and parts with moderate surface detail. Pressure forming adds compressed air to push the heated sheet more firmly into the tool, which can improve definition and cosmetic detail.
- Choose vacuum forming when the geometry is relatively simple, broad features are acceptable, and controlling tooling cost is a priority.
- Choose pressure forming when the part needs sharper lettering, textured surfaces, defined bezels, tighter visual detail, or a more injection-molded appearance.
- Evaluate total cost rather than forming cost alone. A lower-cost process may be less economical if it requires added machining, finishing, or redesign.
Tooling Decisions by Production Volume
Production volume changes the appropriate tooling strategy. Prototype tooling may favor speed and flexibility because geometry can still change. Bridge tooling can support launch quantities while the design is refined. Production tooling should prioritize durability, repeatability, cooling performance, and efficient cycle times.
Before approving a tool, estimate the monthly and lifetime quantities, the expected program length, surface requirements, dimensional tolerances, likely design changes, and whether the mold requires cooling channels or replaceable inserts. The least expensive tool is not always the lowest-cost option over the life of the program.
Design Rules That Improve Part Quality
Thermoformed parts should be designed for material flow, mold release, cooling, trimming, and assembly. Build in draft angles so the part releases cleanly. Use generous radii where walls change direction, avoid unnecessarily sharp inside corners, and plan for additional material stretch in deep draws.
Review vents, mounting holes, ribs, bosses, cutouts, and trim access early. Adequate edge material supports accurate trimming, while well-planned vents prevent trapped air from blocking detail. A focused design-for-manufacturing review can turn a small CAD adjustment into a major reduction in tooling risk.
Quality Control and Common Defects
Quality control should combine visual review, dimensional measurement, wall-thickness checks, fit testing, surface inspection, and functional testing. Common issues include webbing, thin corners, warping, blisters, incomplete detail, and trim variation. Most of these defects are easier to prevent than to sort out after production.
Stable heating profiles, controlled cooling, accurate tools, consistent material supply, and repeatable trim fixtures reduce variation. Inspection criteria should be agreed upon before production, particularly for cosmetic surfaces, critical interfaces, and safety-related components.
Sustainability and Material Efficiency
Material efficiency begins with practical manufacturing choices. Accurate sheet sizing, efficient nesting, controlled trimming, and appropriate wall thickness can reduce scrap without compromising performance. When scrap is unavoidable, planning for collection and recycling supports the broader goal of reducing waste through recycling and responsible material handling.
A lighter part is not automatically more sustainable. Service life, repairability, recycled-content compatibility, part separation, and end-of-life options all matter. A component that fails early can create more material and replacement demand than a durable part designed for a longer working life.
A Practical Project Checklist
- Define the job: Document loads, temperature, chemicals, weather exposure, and service-life expectations.
- Set appearance goals: Specify color, texture, gloss, clarity, and visible-surface requirements.
- Estimate volume: Separate prototype, launch, monthly, and lifetime quantities.
- Compare materials: Review impact, heat, chemical, UV, and regulatory needs by grade.
- Select a forming method: Match vacuum or pressure forming to the required detail and finish.
- Review the design: Check draft, radii, draw depth, venting, wall distribution, and trim access.
- Plan validation: Define fit, function, durability, and dimensional tests before production.
Conclusion
Durable thermoformed parts result from coordinated decisions about material, geometry, tooling, forming method, and quality control. Addressing those factors early helps reduce redesigns, improve consistency, and create plastic components that meet real-world performance expectations.